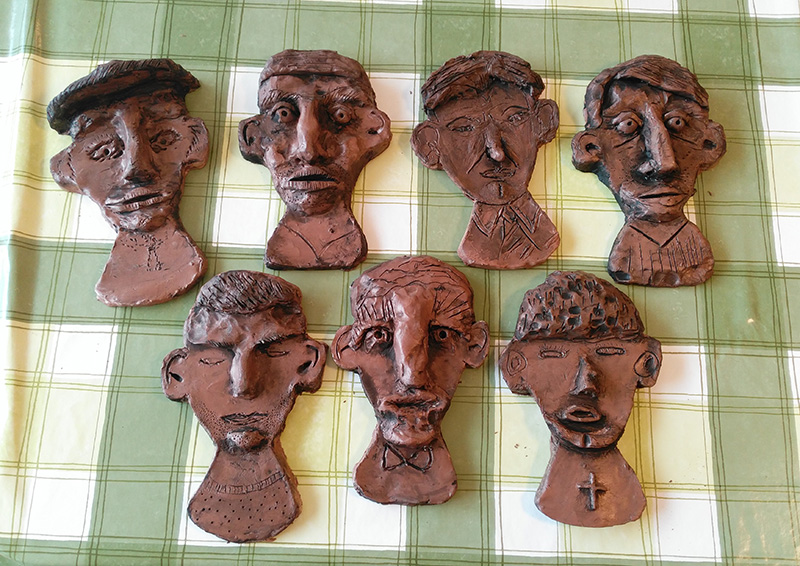
Participants sculpt relief heads out of self-hardening clay. Simple animation software is then used to animate the heads to participants own voices.
Materials Required:
Self-hardening clay (terracotta is best)
Clay sculpting tools
A plastic sheet (A4 size)
Burnt umber acrylic paint
Clear acrylic varnish
A camera or phone to take a still picture
A voice recorder (or phone app)
A laptop with animation software (Eg. Realillusion Crazytalk)
Step by Step Guide:
Start with a clay ball (about 20cm diameter). On a suitable table, roll the clay out on top of the plastic sheet using a rolling pin, create an oval shape about 1.5 cm thick.
To get the face features in the right place, I use a paper template which has eyes, nose and mouth cut out and neck and shoulders added. Place this onto your rolled clay and cut around it using a plastic knife tool, we’ll use the excess clay shortly. We can mark the position of the eyes, nose and mouth by lightly drawing onto the clay.
Remove the template and use the excess clay to begin to build up the features of the face that stick out- the forehead, the nose, cheeks, lips and chin; this can mostly be done using fingers. (Participants could use each other as models for this).
Now for the eyes. This can be done either by simply drawing with a sharp tool or by building up clay into a 3D oval and drawing on eyelids and pupils etc. Other details like eyebrows and lashes can be added using a sharp tool.
Lastly, add hair. Remember when adding clay to clay, lightly score both surfaces and add a little water, press the clay down firmly; this prevents things falling off when the clay dries. (Top Tip: if you want to eventually hang the heads up, whilst still wet, make a couple of holes to thread string through).
To finish the clay heads off as sculptures, let them dry and give them a coat of clear acrylic varnish. When dry, use some watered down burnt umber (or black) acrylic paint and brush it into all the indents in the clay, then use a sponge or piece of kitchen roll to wipe off the surface paint, this will really bring out the textures and details in the piece, you could then varnish it again.
In order to make an animation, all you need is a photo of the finished head. When using software like Realillusion Crazytalk you must ensure that your head is facing forward a bit like a passport photo, it helps to have a neck and shoulders too. Simply import the picture and follow the step by step wizard to mask the background and place ‘wireframes’ around the face elements. When this process is completed, the software will automatically lip sync the mouth of the clay head to any audio you import into the project and give it movement too. The audio could be participants telling stories, jokes, recipes or having a sing song. You can then import any photo you like as a background too.
Ideas for Further Activities With This Idea:
Participants could make heads that are characters from a story or a scene from a favourite film. They could then take turns telling the story and even use different accents to use as an audio track. With a little help, a quite complex film could be created with appropriate dramatic music etc.
Adaptability
Ways to adapt for less able residents:
Pre-rolling and cutting the clay can be helpful. These heads can be as simple or complex as the participant makes them, so the less able could try simply drawing into the clay with different tools to get a variety of details and textures.
Ways to adapt from group to individual and vice versa:
The heads make great individual sculptures but it’s really interesting to bring them into an animation and have them holding conversations. As I’ve mentioned, this could be as characters telling stories or jokes, or even as a clay head choir! I’ve also had participants each answer questions on a questionnaire- on favourite places, things to do, things people miss etc. and compiled this as a little video.